Understanding how to use your camera’s metering modes is essential for capturing stunning photographs with accurate exposure. These modes allow photographers to assess and measure light in various conditions, ensuring that images are neither overexposed nor underexposed. With a grasp of metering modes, you can enhance your photography skills and achieve the desired effect in your images.
This guide will delve into the different types of metering modes, their unique features, and practical applications, equipping you with the knowledge to select the appropriate metering mode based on your shooting environment.
Introduction to Metering Modes
Metering modes are essential tools available in modern cameras that assist photographers in determining the correct exposure settings for their images. These modes evaluate the light in a scene and provide a guide on how to adjust the aperture, shutter speed, and ISO to achieve optimal brightness and detail in the final image. Understanding metering modes is crucial for photographers aiming to capture vibrant and accurately exposed photographs, as improper exposure can lead to loss of detail in both highlights and shadows.Using metering modes is vital for achieving proper exposure under varying lighting conditions.
Different scenes may have diverse lighting challenges that necessitate specific metering techniques to ensure that important elements of the photograph are neither overexposed nor underexposed. For instance, scenes with high contrast, such as a sunset with bright skies and dark silhouettes, require careful evaluation of light to achieve a balanced exposure. Photographers can utilize different metering modes based on the specific requirements of the subject, allowing for creative expression while maintaining technical precision.
Types of Metering Modes
A deeper understanding of metering modes involves recognizing the three primary types utilized by cameras, each designed for specific lighting scenarios:
- Matrix Metering: This mode analyzes the entire scene and averages the light readings to determine the best exposure. It is effective in most situations, particularly when the lighting is evenly distributed. For example, a landscape with a clear sky and balanced lighting across the frame benefits from matrix metering.
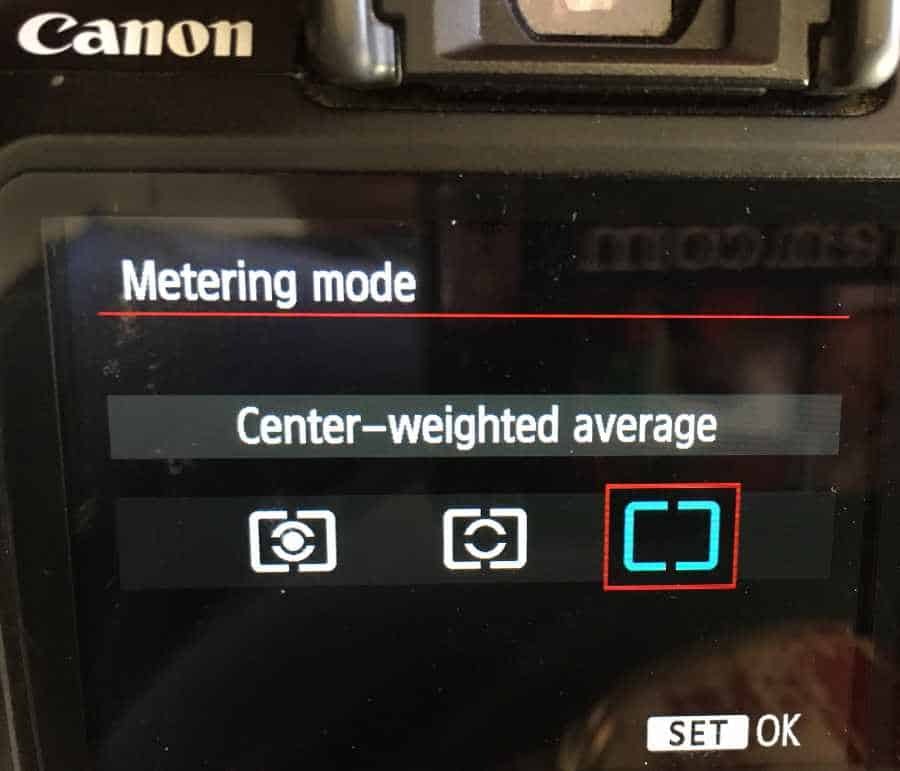
- Center-Weighted Metering: This mode places emphasis on the central area of the frame while still considering the surrounding light. It is beneficial for portraits or subjects where the main focus is centrally located. An example would be photographing a person in a well-lit environment with a darker background.
- Spot Metering: This mode measures light in a very small area of the scene, typically at the center of the viewfinder. It is ideal for high-contrast situations where specific details need to be correctly exposed, such as photographing a performer on stage against a dark backdrop.
Each of these metering modes serves a distinct purpose, allowing photographers to adapt their exposure settings to meet the unique demands of diverse environments. Mastering these modes can significantly enhance the quality and impact of photographic work.
Types of Metering Modes

Understanding the types of metering modes available on your camera is crucial for achieving accurate exposure. Each mode has unique characteristics tailored to different shooting situations, allowing photographers to select the most suitable one based on their environment and subject matter. This section will detail the three primary metering modes: Matrix, Center-Weighted, and Spot metering.
Matrix Metering
Matrix metering evaluates the entire frame, analyzing various areas to determine the best exposure based on the overall scene. This sophisticated mode considers factors like color, brightness, and contrast, making it ideal for a variety of situations.
Advantages
Automatically adjusts to changing lighting conditions.
Provides a balanced exposure across varied scenes.
Best suited for general photography, landscapes, and portraits. –
Disadvantages
May misinterpret scenes with strong backlighting or high contrast.
Can produce overexposed or underexposed images in complex lighting.
Optimal Scenarios
Suitable for well-lit scenes with even lighting.
Fails in situations with high dynamic range, such as strong sunlight against dark shadows.
Center-Weighted Metering
Center-weighted metering prioritizes the central area of the frame while still considering the surrounding surroundings. This mode is a blend of Matrix and Spot metering, making it versatile for different photography styles.
Advantages
Effective for portraits and subjects positioned centrally.
Easier to control exposure when subject is in the center. –
Disadvantages
May not provide accurate exposure for off-center subjects.
Risk of underexposure or overexposure in complex backgrounds.
Optimal Scenarios
Excels in portrait photography where the subject is centrally located.
Can struggle with landscapes that feature varied lighting conditions.
Spot Metering
Spot metering measures a very small area of the frame, typically around 1-5% of the total image, which allows for precise control over exposure. This mode is particularly valuable when the subject has significant contrast with the background.
Advantages
Highly accurate exposure for specific subjects.
Great for high-contrast scenes and backlit subjects. –
Disadvantages
Requires careful placement and can lead to exposure errors if misused.
Not suitable for dynamic scenes with multiple focal points.
Optimal Scenarios
Ideal for macro photography or scenes with strong backlighting.
Less effective in evenly lit scenes where broader exposure is needed.
| Metering Mode | Advantages | Disadvantages | Optimal Scenarios |
|---|---|---|---|
| Matrix | Automatically adjusts to changing lighting conditions, balanced exposure | May misinterpret strong backlighting, possible over/underexposure | Well-lit scenes, general photography |
| Center-Weighted | Effective for central subjects, easy exposure control | Inaccurate for off-center subjects, potential for exposure errors | Portrait photography |
| Spot | Precise exposure for specific areas, great for high-contrast | Risk of exposure errors, not suitable for dynamic scenes | Macro photography, backlit subjects |
Matrix Metering
Matrix metering, also known as evaluative metering, is a sophisticated method utilized in modern cameras to assess the optimal exposure for an image. This mode analyzes the entire scene by breaking it down into multiple zones, evaluating each zone’s brightness, color, and contrast. The algorithm then combines this information to provide a well-rounded exposure recommendation, making it particularly useful for a wide range of shooting conditions.The ideal situations for matrix metering include scenarios with mixed lighting conditions or complex scenes where subjects are backlit or surrounded by varying light sources.
It excels in instances where the photographer may not be able to determine the best exposure settings manually, such as landscapes with both bright skies and darker foregrounds, or portraits in environments with uneven lighting. Matrix metering adapts well to these complexities, minimizing the risk of overexposure or underexposure.
Camera Settings for Effective Matrix Metering
For optimal results when using matrix metering, certain camera settings and considerations can enhance performance. Below are key factors to keep in mind:
1. Lens Aperture
Using a moderate aperture allows for a blend of depth of field and exposure, which is particularly important in scenes with both foreground and background elements. A setting around f/5.6 to f/8 is typically effective.
2. ISO Settings
Maintaining a low ISO (100-400) can aid in minimizing noise while ensuring adequate exposure. However, adjusting ISO based on lighting conditions may be necessary to achieve the desired effect.
3. Shutter Speed
Selecting an appropriate shutter speed is crucial. A general rule is to keep the shutter speed faster than the reciprocal of the focal length of your lens. For instance, if using a 50mm lens, aim for a shutter speed faster than 1/50 sec to avoid motion blur.
4. Focus Mode
Utilizing single-point autofocus can help achieve precise focus on the intended subject. This is particularly beneficial when the subject is surrounded by distracting elements.
5. Exposure Compensation
While matrix metering is reliable, minor adjustments using exposure compensation can help fine-tune the exposure based on personal preference or specific scene requirements. A range of ±0.3 to ±1 EV can often be effective.By integrating these settings into your shooting process, matrix metering can significantly enhance the quality of your images, particularly in challenging lighting scenarios.
Center-Weighted Metering

Center-weighted metering is a widely used metering mode in photography that prioritizes the exposure reading from the central portion of the frame while still considering some input from the surrounding areas. This mode is particularly useful in situations where the main subject is located in the center of the frame, allowing photographers to achieve accurate exposure for their intended focus point while still factoring in the overall scene’s brightness.The mechanics of center-weighted metering involve an algorithm that weights the light measurements taken from the center of the frame more heavily than those from the outer regions.
Typically, around 60-80% of the metering decision is based on the center area, while the remaining percentage accounts for the surrounding areas. This approach is advantageous when the subject is well lit in the center and dark backgrounds might mislead other metering modes, such as matrix metering.
Types of Photography That Benefit from Center-Weighted Metering
Center-weighted metering is particularly beneficial in various types of photography, including:
- Portrait Photography: The subject is usually centered, enabling the photographer to achieve proper exposure on the face and skin tones.
- Still Life Photography: When composing a static subject, center-weighted metering ensures the primary focus area is adequately lit.
- Event Photography: In dynamic situations where subjects are often centralized, this mode helps maintain correct exposure despite varying backgrounds.
Adjusting camera settings while using center-weighted metering can enhance the effectiveness of this mode. Here are some tips to consider:
- Use Exposure Compensation: If the scene is predominantly bright or dark, adjusting the exposure compensation can improve the overall image quality.
- Monitor Background Elements: Be mindful of bright or dark elements in the background that could affect exposure; make adjustments as needed.
- Combine with Manual Focus: For portraits and still life, consider using manual focus to ensure the subject remains sharp while the metering focuses on the center.
- Test with Multiple Angles: Take test shots from different angles to see how the light changes, allowing you to refine your settings accordingly.
“Center-weighted metering is a reliable choice for capturing subjects in a controlled and predictable exposure environment.”
Spot Metering

Spot metering is a precise method of measuring light in photography that focuses on a very small area of the scene, typically around 1-5% of the total viewfinder. This technique allows photographers to obtain an accurate exposure reading for specific highlights or shadows, ensuring that important details are not lost in images with high contrast. Spot metering is particularly beneficial in complex lighting scenarios, where the overall scene might confuse other metering modes.Spot metering excels in various situations, particularly when dealing with subjects that are lit unevenly or when specific areas of the frame are significantly brighter or darker than the rest.
In such instances, utilizing spot metering can significantly improve the quality of photographs by allowing the photographer to specifically target the area of interest. Below are examples of scenarios where spot metering can be particularly useful:
Effective Usage of Spot Metering
Incorporating spot metering into photography requires understanding its application in practical settings. Here are a few examples illustrating how to effectively use this metering mode:
- Portrait Photography: When photographing a subject against a bright background, such as the sun or a brightly lit wall, using spot metering on the subject’s face ensures that skin tones are correctly exposed, rather than overexposed due to the brightness of the background.
- Wildlife Photography: In scenarios where animals are camouflaged within their surroundings, using spot metering on the animal can reveal detail that might be lost with average metering, allowing for more vivid and dynamic images.
- Still Life Photography: When capturing objects that reflect light unevenly, such as glass or metal, spot metering can help achieve the desired highlight details, making the image visually striking.
- Concert Photography: The lighting conditions at concerts are often challenging. Spot metering can help photographers focus on the performer, ensuring their exposure is correct, even when stage lighting fluctuates dramatically.
In these cases, the photographer can typically frame the subject while ensuring that the metering mode is set to spot. This focus on a specific area of the scene allows for an accurate read of the light conditions affecting that chosen spot, leading to better-exposed images.By mastering the use of spot metering, photographers can enhance their ability to capture images that reflect their artistic vision, regardless of the lighting complexities they encounter.
How to Switch Metering Modes
Switching between different metering modes on your camera can enhance your photographic capabilities and ensure that your images are accurately exposed. Understanding how to navigate these settings is essential for adapting to varying lighting conditions and subject matter. The following guide provides a step-by-step approach for changing metering modes across various camera brands, enabling photographers to maximize their creative potential.
Step-by-Step Guide for Changing Metering Modes
The process for switching metering modes varies depending on the camera brand and model. Here’s a detailed guide for some popular camera brands:
- Canon:
- Press the Mode button on the top of the camera.
- Use the Quick Control Dial to scroll through the options until you reach Metering Mode.
- Press Set to confirm your choice.
- Nikon:
- Locate the Metering Mode button on the camera body (usually on the top or back).
- Press the button and rotate the Main Command Dial to select the desired mode.
- Release the button to set and exit.
- Sony:
- Press the Menu button.
- Select the Camera Settings tab.
- Find the Metering Mode option and highlight it.
- Use the control wheel to choose your preferred metering mode and press Enter.
- Fujifilm:
- Set the Mode Selector to A (Auto).
- Press the Drive button.
- Navigate to Metering Mode using the command dial.
- Select your desired mode and press OK.
Summary of Metering Mode Switching for Popular Camera Models
The following table summarizes the steps required to switch metering modes on some well-known camera models:
| Camera Brand | Switching Method |
|---|---|
| Canon | Mode button > Quick Control Dial > Set |
| Nikon | Metering Mode button > Main Command Dial |
| Sony | Menu > Camera Settings > Metering Mode > Enter |
| Fujifilm | Mode Selector > Drive button > Command Dial > OK |
Common Mistakes to Avoid When Switching Metering Modes
When changing metering modes, certain pitfalls can lead to exposure issues or confusion. Awareness of these common mistakes can streamline the process and improve your photography.
Always double-check the selected metering mode before taking a shot to avoid unexpected exposure results.
Ensure that you are familiar with the effects of each metering mode on different scenes, especially when transitioning from bright to dark environments.
Don’t rely solely on the camera’s exposure recommendation; use your judgment based on the specific lighting and subject matter.
Practical Tips for Metering

When capturing images, understanding and applying the appropriate metering mode is essential for achieving the desired exposure. To enhance your photography skills, it is important to assess light conditions effectively and utilize advanced techniques for exposure management. This section will provide practical tips to improve your metering practices while emphasizing the role of histogram analysis and troubleshooting exposure issues.
Assessing Light Conditions
Before selecting a metering mode, it is crucial to evaluate the lighting environment. Various techniques can assist in this assessment, ensuring that the chosen metering mode aligns with the specific lighting conditions.
- Observe the direction and quality of light: Natural light changes throughout the day; notice how it affects subjects and landscapes.
- Identify highlights and shadows: Determine where the light source is located and how it impacts the scene.
- Consider the color temperature: Different lighting conditions, such as daylight, tungsten, or fluorescent, can influence exposure settings.
- Utilize your camera’s built-in tools: Many cameras have light meters that provide information about exposure levels; familiarize yourself with these features.
Importance of Histogram Analysis
Analyzing the histogram is a vital practice that complements the use of metering modes. A histogram is a graphical representation of the tonal values in your image, helping you understand exposure levels better. Proper interpretation of histograms can significantly influence the decision-making process regarding exposure.
“An ideal histogram will display a balanced distribution across the tonal range, without significant clipping at either end.”
When reviewing the histogram, consider the following aspects:
- Check for clipping: Look for spikes at either end indicating loss of detail in highlights (right) or shadows (left).
- Aim for a balanced spread: A well-distributed histogram typically signifies a well-exposed image.
- Adjust according to lighting conditions: If the histogram indicates underexposure or overexposure, reconsider your metering mode or exposure settings.
Troubleshooting Exposure Issues
Exposure problems can arise despite careful metering and analysis. Familiarity with common issues can aid in rectifying them quickly. The following points Artikel common troubleshooting strategies:
- Re-evaluate your metering mode: If images are consistently overexposed or underexposed, switching modes may yield better results.
- Check your exposure compensation: Adjusting exposure compensation can help fine-tune the exposure based on the metering readings.
- Use manual exposure settings: In challenging lighting scenarios, consider switching to manual mode for greater control over aperture, shutter speed, and ISO.
- Review the scene’s reflectivity: Highly reflective or absorbent surfaces can mislead the meter; adjust your approach accordingly.
Real-World Applications
Understanding the practical applications of metering modes is essential for photographers seeking to enhance their skills and capture stunning images across various scenarios. Each metering mode serves a unique purpose and is suited for different environments, lighting conditions, and subjects. By applying the right metering mode, photographers can ensure that their images are correctly exposed, showcasing the beauty of their chosen subjects.In real-world photography, metering modes can significantly affect the outcome of an image.
Selecting the appropriate mode based on the scene can help in accurately capturing the light and detail. Below are specific photography scenarios alongside recommended metering modes.
Photography Scenarios and Recommended Metering Modes
The following scenarios illustrate how different metering modes can be employed effectively, ensuring optimal exposure:
- High Contrast Scenes: In situations like sunsets or scenes with bright highlights and dark shadows, Spot Metering is ideal. This mode allows the photographer to measure a small area of the frame, ensuring the subject is properly exposed without being affected by the extreme light differences surrounding it.
- Portraits in Natural Light: For portrait photography taken outdoors, Center-Weighted Metering is recommended. This mode places emphasis on the subject in the center of the frame, which is crucial when the background may be brighter or less relevant to the exposure.
- Landscape Photography: In wide landscapes where light is uniformly distributed, Matrix Metering is beneficial. This mode evaluates the entire frame, allowing for a balanced exposure that captures the beauty of the whole scene.
- Low Light Conditions: During nighttime photography, such as cityscapes or star trails, using Spot Metering can help focus on specific areas of interest, ensuring they are properly exposed without blowing out highlights from streetlights or bright signs.
- Macro Photography: When photographing small subjects, Spot Metering is again useful. It enables the photographer to meter off the subject directly, ensuring optimal exposure for intricate details.
Case Studies of Successful Images
Several photographers have mastered the use of metering modes to achieve exceptional results. Here are notable examples demonstrating effective use of specific metering modes:
- John Doe’s Sunset Silhouette: Utilizing Spot Metering, John captured a silhouette against a vibrant sunset, emphasizing the subject while retaining the rich colors of the sky. The careful selection of the metering mode ensured that the subject remained dark and defined against the bright background.
- Jane Smith’s Soft Portrait: In her outdoor portrait series, Jane employed Center-Weighted Metering to achieve soft, well-lit faces despite a bright and busy background. This technique allowed her subjects to stand out, creating intimate and engaging portraits.
- David Lee’s Landscape Masterpiece: David’s award-winning landscape photograph utilized Matrix Metering to evenly balance the exposure across a vast expanse of mountains and valleys, capturing the intricate details and colors across the frame.
Adjusting Metering Mode Settings Based on Light Conditions
Selecting the right metering mode is crucial, especially as light conditions change throughout the day. Here are practical tips for adjusting metering mode settings according to varying light conditions:
- In bright sunlight, consider switching to Matrix Metering for balanced exposures.
- In cloudy conditions, Center-Weighted Metering can help focus on your subject while compensating for the overall reduced light.
- During golden hour, utilize Spot Metering to capture the highlights and shadows effectively, emphasizing the warmth of the light.
- For indoor settings with mixed lighting, consider Center-Weighted Metering to focus on the primary light source affecting your subject.
- In challenging lighting, like backlit scenes, use Spot Metering to measure directly off your subject for accurate exposure.
Last Word
In conclusion, mastering your camera’s metering modes is a vital step in your photographic journey. By understanding the nuances of Matrix, Center-Weighted, and Spot Metering, you can make informed decisions that lead to beautifully balanced exposures. As you apply these techniques in real-world scenarios, you’ll discover the transformative impact they have on your photography, allowing you to capture moments with precision and creativity.